Wondering how long it takes for gardenia cuttings to root? This guide gives real timelines and the exact steps to help you root faster with fewer losses.
Gardenias are beautiful, but they can be picky when you try to root them. The short answer is that gardenia cuttings usually root in 3 to 8 weeks, but the exact time depends on the season, cutting type, warmth, humidity, and your method. With bottom heat, high humidity, and rooting hormone, you can see roots in as little as 14 to 21 days. Without those, it may take 6 to 10 weeks, and some cuttings will fail.
This article teaches you the expected timeline, the factors that speed or slow rooting, and proven, step-by-step methods. You will also learn how to read the signs that roots are forming, how to fix common problems, and how to care for new plants after rooting. The goal is simple: reduce guesswork and give you a repeatable plan.
If you are new to propagation, do not worry. Each section is simple, clear, and practical. Follow the checklists, use clean tools, and adjust one variable at a time. You will see better results with every batch.
Quick answer: How long do gardenia cuttings take to root?
Most gardenia cuttings root in 3 to 8 weeks. The sweet spot for fast rooting is late spring to mid-summer, with warm, steady conditions and high humidity.
- Fast track (ideal setup: softwood cuttings + IBA hormone + 75–80°F/24–27°C bottom heat + 90–100% humidity): 2–4 weeks.
- Standard home setup (no heat mat, moderate humidity): 4–8 weeks.
- Semi-hardwood or cool rooms: 6–10 weeks.
- Hardwood or poor conditions: 8–12+ weeks or failure.
Signs of progress show up before you see roots. New buds swell, leaves look firm, and the cutting resists a gentle tug. If the cutting collapses or blackens at the base, restart with better sanitation and air flow.

Image source: Pexels | Photo by Eva Bronzini on Pexels
What affects rooting time?
Gardenias root on their terms. These are the main factors that set the clock.
1) Cutting type and timing
- Softwood (spring to early summer): roots fastest; 2–6 weeks.
- Semi-hardwood (mid to late summer): 4–8 weeks; more reliable structure.
- Hardwood (fall/winter): slow; 8–12+ weeks; lower success at home.
Take cuttings from healthy, non-flowering shoots. Flowering stems root slower because energy goes to blooms.
2) Temperature (air vs. root zone)
- Root zone warmth is key. Aim for 75–80°F (24–27°C) at the medium.
- Air can be cooler, around 68–75°F (20–24°C).
- Cold media delay roots. Hot media increase rot. Keep it steady.
3) Humidity and air flow
- High humidity (90–100%) prevents leaf wilt while roots form.
- Use a dome or clear bag, but vent daily to avoid fungus.
- Gentle air movement helps keep leaves dry and clean.
4) Light
- Bright, indirect light is best. Avoid direct, hot sun on domes.
- 12–14 hours of light with LED grow lights works well indoors.
5) Medium and moisture
- Use a sterile, well-drained mix: 1:1 perlite and peat/coir, or straight perlite.
- Moist, not wet. Soggy media starve stems of oxygen.
- pH near 5.5–6.5 suits gardenia cuttings.
6) Rooting hormone
- IBA (indole-3-butyric acid) gel or powder speeds rooting and raises success.
- Typical rate: 0.3–0.8% IBA gel for softwood; up to 1% for semi-hardwood.
- Tap off excess powder; thick layers can burn tissue.
7) Cultivar and plant health
- Some cultivars root faster. ‘Radicans’ and many dwarf types root well.
- Mother plant health matters. Well-watered, disease-free stock gives vigorous cuttings.

Image source: Pexels | Photo by Daniel Dan on Pexels
Week-by-week rooting timeline
Use this realistic timeline for softwood or semi-hardwood gardenia cuttings under a dome or in a propagation tray.
Day 0: Prepare and stick
- Hydrate the donor plant well the day before.
- Take 3–5 inch cuttings from non-flowering tips. Cut just below a node.
- Strip lower leaves. Keep 2–3 leaves at the top. Halve large leaves.
- Dip the base in IBA gel/powder. Tap off excess.
- Insert into pre-moistened medium. Firm gently.
- Mist leaves. Cover with a dome or clear bag. Place on a heat mat if possible.
Days 1–7: Callus starts
- Vent daily for 10–20 minutes to refresh air.
- Keep medium evenly moist. Do not overwater.
- Look for leaf turgor. Mild wilt mid-day is normal under high light.
Days 8–14: Root initials form
- Maintain 75–80°F at the root zone and bright, indirect light.
- Gently tug on day 12–14. Light resistance means roots are forming.
- Remove any yellowing leaves to reduce rot.
Days 15–28: Root growth
- Many softwood cuttings show roots by week 3 or 4 under ideal conditions.
- Begin cracking the dome open a bit longer each day to lower humidity.
- If tips stall, check temperature and moisture. Warm and slightly drier is better than cold and wet.
Days 29–42: Harden and pot up
- Confirm roots by visible tips at drainage holes or a firm “tug test.”
- Transplant into a small pot (3–4 inches) with acidic, airy mix.
- Move to bright shade. Keep evenly moist. Do not fertilize for 2 weeks.
Days 43–60: Establishment
- Start light feeding with an acid-loving fertilizer at 1/4 strength.
- Increase light slowly. Avoid heat stress or direct midday sun.
- Pinch tips to encourage branching if desired.

Image source: Pexels | Photo by Ylanite Koppens on Pexels
Propagation methods compared
Choose a method that suits your space and tools. Results vary, but these time frames are common.
1) Perlite + peat/coir (classic tray method)
- Time to root: 3–8 weeks.
- Pros: Cheap, high success, good air-to-water ratio.
- Cons: Needs dome and regular venting; watch for fungus gnats.
- Tips: Pasteurize media in the oven (30 minutes at 180°F/82°C) or use sterile bagged mix.
2) Straight perlite or perlite + vermiculite
- Time to root: 3–6 weeks (fast due to aeration).
- Pros: Great drainage, low rot.
- Cons: Needs careful watering and bottom heat to avoid drying.
- Tips: Water by bottom-wicking to keep bases stable.
3) Sphagnum moss (long-fiber)
- Time to root: 4–8 weeks.
- Pros: Holds moisture; contains natural antimicrobial compounds.
- Cons: Easy to overpack; can stay too wet.
- Tips: Soak, rinse, and wring out. Moss should be moist, springy, not dripping.
4) Water rooting
- Time to root: 4–8+ weeks; variable.
- Pros: Easy to monitor.
- Cons: Roots formed in water can be brittle and adapt poorly to soil.
- Tips: Change water often. Pot up as soon as 1–2 inch roots form.
5) Misting/clone machines
- Time to root: 2–4 weeks (very fast under steady warmth and oxygen).
- Pros: High oxygen, stable moisture.
- Cons: Equipment cost; sanitation is vital.
- Tips: Use a low-dose rooting solution and clean reservoirs weekly.

Image source: Pexels | Photo by cottonbro studio on Pexels
Setup checklist and materials
Use this quick checklist to improve speed and success.
Tools
- Sharp pruning shears or a clean utility knife.
- Rubbing alcohol or a 10% bleach solution for sterilizing tools.
- Small pots or a propagation tray with cells.
- Humidity dome or clear food-safe bags with stakes.
- Heat mat with thermostat for precise root zone temp.
- Spray bottle with clean water.
Supplies
- Rooting hormone gel or powder with IBA.
- Media: perlite, and peat or coco coir (1:1 mix), or straight perlite.
- Optional: beneficial microbes or a mild fungicide labeled for cuttings.
- Labels and dates for tracking batches.
Medium prep
- Mix media and moisten evenly. It should clump when squeezed, but no water should drip.
- Fill pots or trays and firm lightly. Pre-poke holes for stems to avoid scraping hormone off.
Cutting prep
- Choose non-flowering, healthy shoots. No pests or leaf spots.
- Cut just below a node at a 45-degree angle.
- Remove lower leaves. Keep 2–3 leaves on top. Reduce leaf area if large.
- Optional: lightly wound one side of the stem base to expose cambium. This can speed rooting.
Sticking and placement
- Dip in hormone. Tap off extra.
- Insert into holes; firm the medium around the stem to remove air gaps.
- Mist leaves. Cover and place in bright, indirect light.
- Set the heat mat to 77°F (25°C). Check with a thermometer probe in the medium.
Troubleshooting slow or failed rooting
Use this symptom-to-cause guide to correct problems fast.
Leaves droop or curl daily
- Likely cause: low humidity or high light.
- Fix: increase humidity; move to bright shade; shorten light periods slightly.
Base turns brown/black and mushy
- Likely cause: overwatering, cold media, or dirty tools.
- Fix: improve drainage; warm the root zone; sterilize tools; consider a fresh batch with sterile media.
No roots after 6 weeks, but the cutting is still green
- Likely cause: low temperature or low auxin.
- Fix: add bottom heat; re-stick fresh cuttings with a suitable IBA strength; use semi-hardwood tips if midsummer.
Leaves turn yellow and drop
- Likely cause: stress and nutrient drawdown.
- Fix: keep conditions steady; avoid fertilizing unrooted cuttings; maintain gentle light.
Fuzzy white/gray growth on leaves or medium
- Likely cause: fungus due to stagnant air.
- Fix: vent domes daily; remove affected leaves; increase air movement; reduce moisture on leaf surfaces.
Roots form, then stall after potting
- Likely cause: transplant shock or strong sunlight.
- Fix: harden off by lowering humidity over 3–5 days; pot up to a slightly bigger container; keep in bright shade for 1–2 weeks.
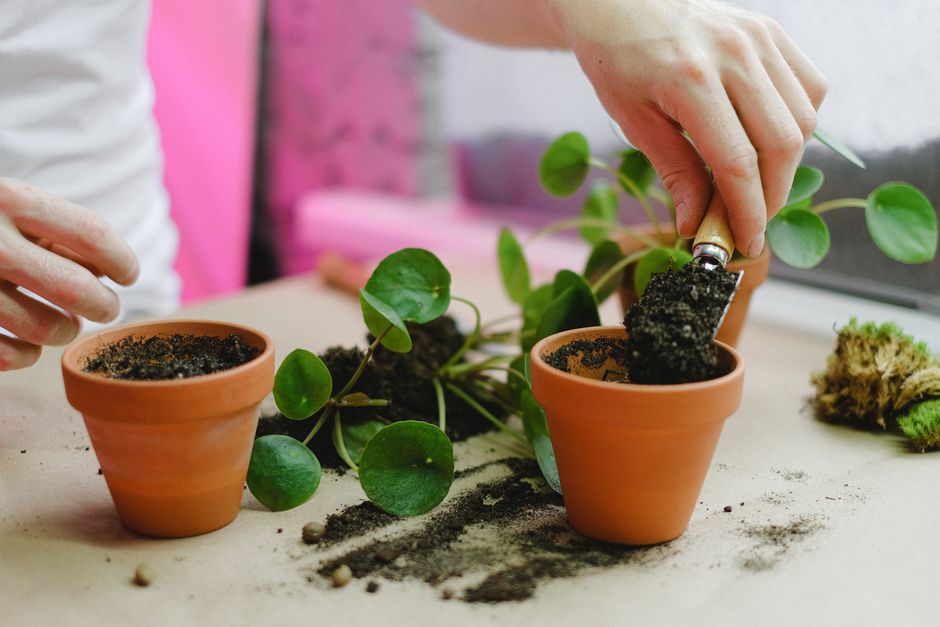
Image source: Pexels | Photo by Anna Shvets on Pexels
After roots form: potting up and care
New roots are tender. Good aftercare locks in your early gains.
Potting up
- Wait until the cutting resists a gentle pull or you see roots at the drain holes.
- Choose a 3–4 inch pot with holes. Use an acid-loving mix (peat/coir + perlite, or azalea-camellia mix).
- Transplant with the root ball intact. Do not tease roots.
- Water to settle. Keep in bright shade for 5–7 days.
Hardening off
- Reduce humidity over 3–5 days. Open the dome longer each day.
- Increase light slowly. Avoid midday sun at first.
Feeding and pruning
- Begin feeding at 1/4 strength after 2 weeks in the new pot.
- Use an acid-forming fertilizer. Maintain pH on the acidic side.
- Pinch the tip after the first flush to promote bushy growth.
Watering
- Keep evenly moist but never soggy. Gardenias dislike wet feet.
- Use room-temperature water. Cold water can shock roots.
Best timing by season and zone
Timing is the biggest lever you can pull for speed and success.
- Late spring to early summer: best window for softwood cuttings; 2–6 weeks to root in ideal settings.
- Mid to late summer: semi-hardwood stage; 4–8 weeks; durable cuttings, good balance of vigor and structure.
- Fall and winter: slow; consider indoor setups with heat mats and lights; expect 6–12 weeks.
In warm climates, you can root almost year-round indoors. In cooler zones, aim for late spring and summer. If you must propagate in winter, add bottom heat, a dome, and stable lighting for the best chance.
Step-by-step: fastest method for most home growers
Use this streamlined protocol if you want the best odds of roots in 2–4 weeks.
- Pick softwood tips 3–5 inches long from a well-watered, pest-free gardenia.
- Sterilize the blade. Make a 45-degree cut below a node. Remove lower leaves and flowers.
- Wound the lower stem lightly on one side (optional but helpful).
- Dip in 0.3–0.8% IBA gel. Tap off excess if powder.
- Stick into a 1:1 perlite:peat mix in small cells or 3-inch pots. Pre-poke holes to protect the hormone layer.
- Mist leaves. Cover with a clear dome or bag on spacers.
- Place on a 77°F (25°C) heat mat. Give bright, indirect light for 12–14 hours daily.
- Vent daily 10–20 minutes. Keep the medium moist, not wet.
- Check for light resistance after day 12. Begin hardening once roots form.
- Pot up after you see visible roots or strong resistance. Harden off and start light feeding after 2 weeks.
Common mistakes that slow down rooting
- Cuttings taken from flowering stems. Use vegetative shoots instead.
- Cold media. Warm the root zone, not just the air.
- Overwatering. Saturated media starve stems of oxygen.
- No humidity control. Leaves wilt and stress the cutting.
- Too much light or direct sun on the dome. Heat builds and cooks tissue.
- Skipping sanitation. Dirty blades introduce rot organisms.
- Heavy hormone coating. It can burn the stem base.
How to tell roots are forming (without unpotting)
- Tug test: gentle resistance after 2–3 weeks under good conditions.
- Buds swell; tiny new leaves appear and stay firm.
- Color stays bright green; no collapse at the base.
- Condensation inside the dome drops as the cutting starts transpiring better.
FAQs
How long does it take for gardenia cuttings to root in water?
Expect 4–8 weeks. Water rooting is simple, but soil transition can be rough. Pot up once roots reach 1–2 inches. Move to a humid chamber for a few days to ease the switch.
What is the best month to take gardenia cuttings?
Late spring through early summer is best for speed. Semi-hardwood cuttings taken in mid-summer also root well and give sturdy young plants.
Do I need rooting hormone for gardenia cuttings?
It is not mandatory, but it helps a lot. IBA hormone reduces time and increases strike rate. Use 0.3–0.8% IBA for softwood; up to 1% for semi-hardwood.
Why are my gardenia cuttings turning black at the base?
That is often rot from wet, cold media or poor sanitation. Warm the root zone to 75–80°F, improve drainage, vent the dome daily, and sterilize tools. Start a new batch with fresh, clean media.
Can I root gardenia cuttings without a humidity dome?
You can, but expect more wilting and slower rooting. A simple clear bag over a pot works well. Vent daily and keep the bag off the leaves with small stakes.
How long after rooting should I fertilize new gardenias?
Wait about 2 weeks after potting up. Then feed lightly at 1/4 strength with an acid-forming fertilizer. Increase slowly as growth speeds up.
What size cutting is best?
3–5 inches long with 2–3 nodes is ideal. Keep 2–3 leaves. Shorter cuttings dry out fast; longer cuttings wilt and root slowly.
Conclusion
Gardenia cuttings usually root in 3 to 8 weeks. With softwood tips, IBA hormone, warm media, and high humidity, you can often see roots in 2 to 4 weeks. The biggest keys are steady warmth at the root zone, bright but gentle light, and a loose, sterile medium.
Focus on clean cuts, correct moisture, and daily ventilation. Use a simple checklist, track dates, and change only one variable at a time. With this approach, your rooting time drops and your strike rate climbs. Soon you will have healthy, fragrant gardenias ready for the garden or patio.