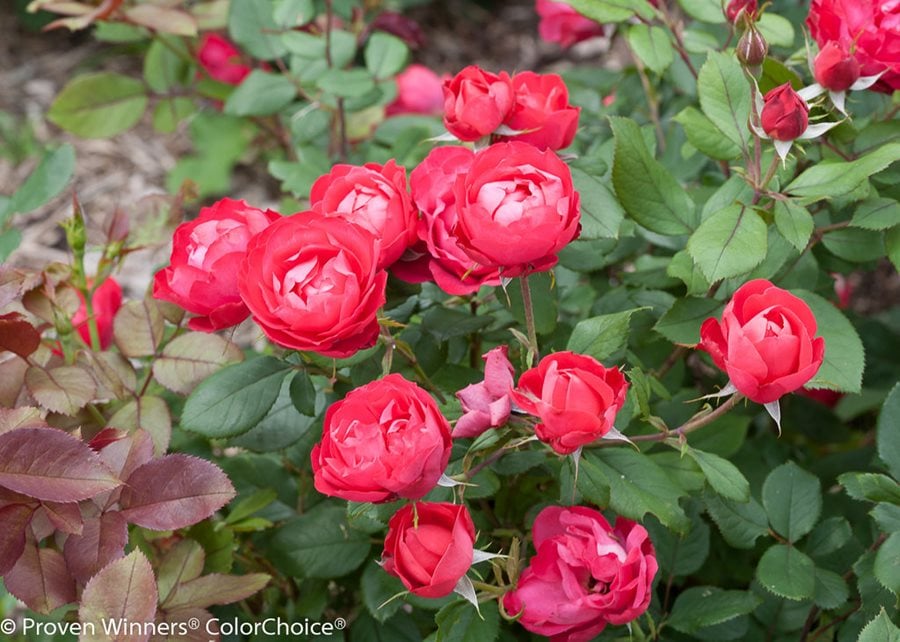
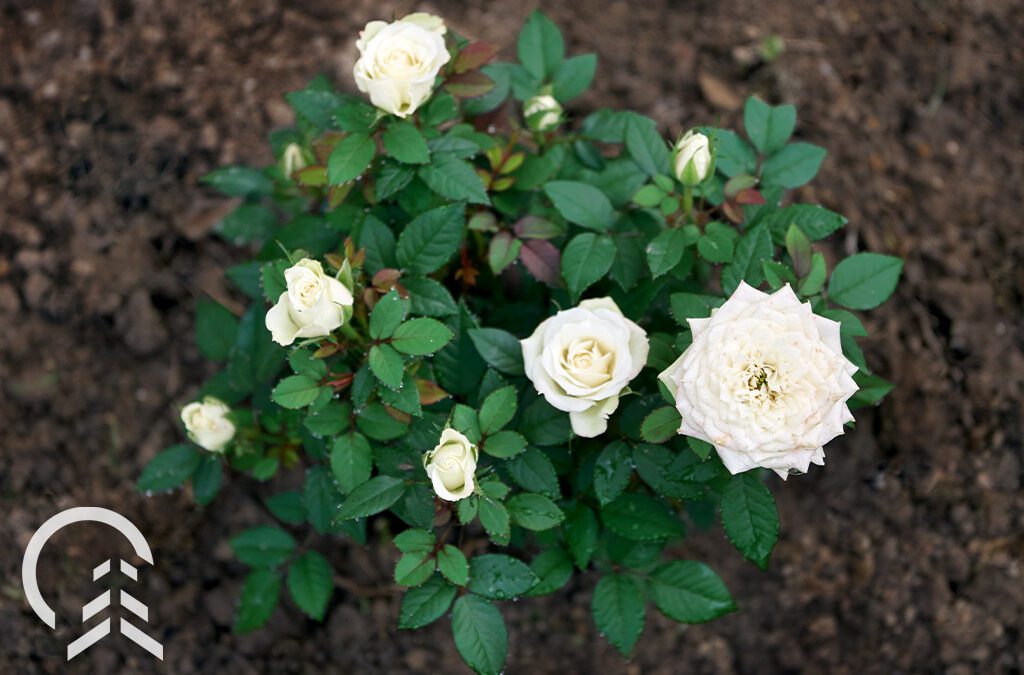
If you’ve ever dreamed of lush, blooming rose bushes but felt intimidated by the process, you’re in the right place. I’ve planted and rehabbed dozens of roses in real backyards, clay soil, and unpredictable weather. In this guide, I’ll demystify how to plant roses in the ground for beginner’s, from choosing the right spot to that first satisfying flush of blooms. You’ll get expert-backed steps, personal tips, and mistakes to avoid—so you can plant with confidence and enjoy roses that thrive for years.
Understand Your Roses: Choosing The Right Type And Spot
Picking the right rose and placing it in the right location is half the battle. Roses are more cooperative than their reputation suggests, as long as you meet a few non-negotiables.
- Choose a rose type that fits your climate and lifestyle
- Hybrid tea: Classic florist-style blooms; great for cutting; needs consistent care.
- Floribunda: Clusters of blooms; steady color; beginner-friendly.
- Shrub/landscape roses: Hardy, disease-resistant, low maintenance.
- Climbing roses: Train on fences/trellises; need structure and pruning.
- Groundcover roses: Sprawl and suppress weeds; excellent for borders.
- Match sun and airflow
- Aim for 6 to 8 hours of direct sun daily. Morning sun is ideal to dry leaves quickly.
- Ensure good airflow to reduce fungal issues.
- Respect your zone and rose rootstock
- Check your USDA hardiness zone and pick varieties proven to perform there.
- Grafted roses are common; cold climates may prefer planting the bud union slightly below soil level for winter protection.
Personal tip: If you’re new to roses, start with a disease-resistant shrub rose. They forgive uneven watering and imperfect pruning, and they bloom generously.
Best Time To Plant: Set Your Roses Up For Success
Timing affects how quickly your rose establishes.
- Bare-root roses: Plant in early spring while dormant, after the soil is workable but before buds leaf out.
- Container roses: Plant spring through early fall, avoiding extreme heat.
- Hot climates: Plant in late winter or early spring to avoid summer shock.
- Cold climates: Spring planting is safest; fall planting is possible if you have 6 to 8 weeks before the ground freezes.
Research shows roses establish best when soil is moderately warm and moist, not soggy.

Soil Preparation: Build A Rose-Friendly Foundation
Great soil grows great roses. Roses love rich, well-drained soil with a slightly acidic pH.
- Test and tune your soil
- Target pH: 6.0 to 6.8. Use a simple home test kit.
- Amend clay soil with compost and coarse organic matter to improve drainage.
- Sandy soil benefits from compost to boost water and nutrient retention.
- Enrich with organic matter
- Mix 2 to 3 inches of compost into the top 12 to 18 inches of soil.
- Add aged manure or leaf mold for slow-release nutrients.
- Improve drainage if needed
- In persistently wet areas, mound the planting bed 8 to 12 inches high or plant on a slight slope.
Lesson learned: In heavy clay, I now dig wider, not deeper, and blend at least a bucket of compost per planting hole. My roses stopped sulking and started shooting canes within weeks.

Tools And Materials Checklist
Before you start, assemble everything to make the process smooth.
- Spade or digging shovel
- Hand pruners and gloves
- Measuring tape or ruler
- Compost and mulch
- Root stimulator or mycorrhizal inoculant (optional but helpful)
- Hose with a gentle shower nozzle or watering can
- pH test kit and soil amendments as needed
Step-By-Step: How To Plant Roses In The Ground For Beginner’s
Follow these steps for both bare-root and container roses, with small adjustments.
- Hydrate and prep
- Bare-root: Soak roots in a bucket of water for 2 to 12 hours before planting.
- Container: Water thoroughly so the root ball is evenly moist.
- Dig the right hole
- Width: 2 to 3 times the width of the root ball.
- Depth: Just deep enough so the bud union (the knob where rose is grafted) sits at or slightly above soil level in warm zones, and 1 to 2 inches below in cold zones.
- Create a planting cone
- For bare-root roses, mound a cone of soil in the center of the hole. Spread roots evenly over the cone.
- Set the plant and backfill
- Position the rose with its best side facing the viewing angle.
- Dust roots with mycorrhizae if using.
- Backfill halfway, water to settle, then finish filling. Lightly tamp to remove air pockets.
- Water deeply
- Give 1 to 2 gallons right after planting. Let water soak slowly.
- Mulch and label
- Apply 2 to 3 inches of organic mulch, keeping it 2 inches away from the cane bases.
- Add a label with variety and planting date.
Pro tip: Don’t add high-nitrogen fertilizer at planting. Focus on root establishment. A balanced, gentle feed comes later.
First 8 Weeks: Watering, Feeding, And Early Care
The establishment period determines long-term performance.
- Watering schedule
- Weeks 1 to 2: 3 to 4 deep waterings per week if no rain.
- Weeks 3 to 6: 2 to 3 times per week.
- Adjust by soil: clay less often, sandy more often. Aim for moist, not soggy.
- Feeding strategy
- At 4 weeks, apply a balanced rose fertilizer at label rate, or use fish/seaweed emulsion for gentle nutrition.
- Stop fertilizing 6 to 8 weeks before your first expected frost.
- Sun and stress control
- If planting during a heatwave, create temporary shade with a lawn chair or shade cloth for a few afternoons.
- Early pruning
- Only remove dead or broken canes at planting. Save shaping for late winter/early spring.
Personal insight: A moisture meter taught me I was overwatering. Roses like deep drinks followed by time to breathe.
Mulching And Weed Control
Mulch is your rose’s best friend.
- Benefits of mulch
- Evens out soil temperature and moisture.
- Suppresses weeds that compete for nutrients.
- Reduces splash that spreads disease.
- Best mulches
- Shredded bark, wood chips, pine straw, or composted leaves.
- Refresh annually to maintain a 2 to 3-inch layer.
- Weed strategy
- Hand-pull small weeds after rain when roots release easily.
- Avoid deep cultivation that can damage shallow feeder roots.
Staking, Spacing, And Airflow
Structure and spacing prevent headaches later.
- Spacing
- Shrub and floribunda: 2.5 to 3 feet apart.
- Hybrid tea: 2 to 2.5 feet.
- Climbers: 6 to 12 feet depending on vigor.
- Staking and support
- Use a flexible tie; avoid cinching canes.
- For climbers, fan out laterals and tie at 45 to 60 degrees to encourage more blooms.
- Airflow
- Prune out crossing canes in the dormant season to open the center and reduce disease pressure.
Common Mistakes Beginners Make (And How To Avoid Them)
– Planting too deep or too shallow
– Keep the bud union at the correct height for your climate to prevent rot or winter kill.
- Overwatering
- Constantly wet soil suffocates roots. Think deep, infrequent watering.
- Skipping soil prep
- Poor soil equals poor roses. Invest time in compost now for fewer problems later.
- Fertilizing too early
- Early heavy nitrogen leads to soft growth that attracts pests.
- Ignoring sun and airflow
- Shade and stagnant air encourage black spot and mildew.
Story from the garden: I once planted a perfect rose under a lovely tree. It barely bloomed. Moving it to full sun turned it into a showpiece within one season.
Pests, Diseases, And Easy Prevention
Healthy plants resist trouble, but have a plan.
- Fungal diseases
- Black spot and powdery mildew thrive on wet leaves. Water at soil level and space plants well.
- Remove and discard infected leaves; do not compost if disease is heavy.
- Common pests
- Aphids: Blast with water or use insecticidal soap.
- Japanese beetles: Hand-pick in the morning into soapy water.
- Spider mites: Increase humidity with gentle sprays and use horticultural oil if needed.
- Preventive care
- Clean up fallen leaves in fall.
- Choose resistant varieties and rotate where possible.
- Use mulch to reduce splash-back of spores.
Evidence-based practices show that cultural controls and resistant varieties outperform constant spraying for home gardeners.
Seasonal Care Roadmap For Year One
– Spring
– Plant, water deeply, mulch, and begin light feeding at 4 weeks.
– Install supports for climbers early.
- Summer
- Maintain consistent moisture; deadhead to encourage rebloom.
- Light feeding every 4 to 6 weeks if your variety is a repeat bloomer.
- Fall
- Stop feeding 6 to 8 weeks before frost.
- Allow rose hips to form on repeat bloomers to signal dormancy.
- Winter
- In cold zones, mound mulch or compost over the crown after hard frost.
- Protect graft unions with additional mulch or a rose cone in extreme cold.
Frequently Asked Questions Of How To Plant Roses In The Ground For Beginner’s
How much sun do roses really need?
Most roses need 6 to 8 hours of direct sun. Morning sun is especially helpful because it dries leaves and reduces disease pressure.
Should I plant grafted or own-root roses?
Both work. Grafted roses can be vigorous and offer classic varieties; own-root roses can be hardier in cold climates and regrow true to type if top growth is damaged.
What’s the ideal soil pH for roses?
Aim for 6.0 to 6.8. If your soil is too alkaline, add elemental sulfur; if too acidic, add garden lime, following label rates.
How often should I water newly planted roses?
Water deeply 2 to 4 times a week for the first month, adjusting for soil type and weather. The goal is consistently moist, not soggy, soil.
When can I start fertilizing after planting?
Begin light feeding about 4 weeks after planting once you see new growth. Avoid heavy feeding late in the season to prevent tender growth before frost.
Do I need to add fertilizer or compost into the planting hole?
Compost incorporated into the surrounding soil is great. Avoid strong fertilizers in the hole; feed lightly after the plant starts to establish.
How do I know if my rose is planted at the right depth?
In warm zones, the bud union should be at or slightly above soil level. In cold zones, set it 1 to 2 inches below to protect from freeze damage.
Wrap-Up: Your First Rose, Planted Right
Planting roses doesn’t have to be complicated. Choose a sun-soaked spot, prepare rich, well-drained soil, set the plant at the right depth, water deeply, and mulch well. With steady moisture and a little patience, your rose will reward you with steady growth and gorgeous blooms.
Ready to put a shovel in the ground? Start with one rose and follow the steps above this weekend. If you found this guide helpful, subscribe for more practical garden tutorials, share your progress in the comments, or ask a question—I’m happy to help you troubleshoot.